Docs
Choose your preferred AI platform and authentication method to get started with Agentsfera.
Copilot Studio
Integrate Agentsfera with Microsoft Copilot Studio
Microsoft Copilot Studio enables you to build custom AI agents with access to your business data and tools. By connecting Agentsfera via MCP (Model Context Protocol), you can extend your Copilot agents with 500+ business integrations including Jira, Salesforce, Google Workspace, and Azure DevOps.
Why Integrate Copilot Studio with Agentsfera?
- Native MCP Support: Copilot Studio natively supports Model Context Protocol, making integration seamless and straightforward.
- Enterprise-Ready: Leverage Microsoft's enterprise security and compliance while accessing Agentsfera's extensive tool ecosystem.
- Custom Headers Authentication: Secure API key authentication with user-session-id for maintaining conversation context.
- Zero Infrastructure: Agentsfera handles all MCP server hosting, tool routing, and OAuth flows.
Setup Guide
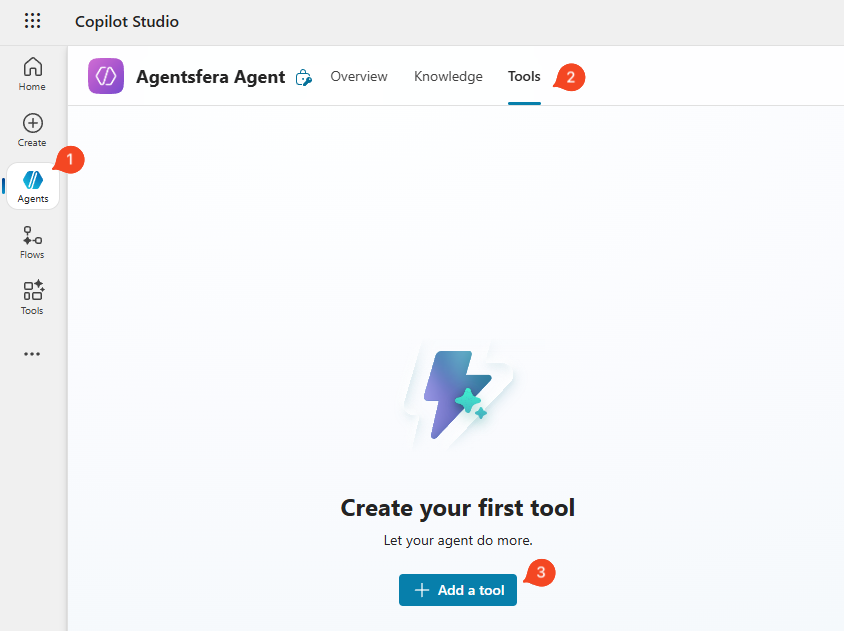
Step 1: Open Copilot Studio and Navigate to Tools
Navigate to Agents in the left sidebar, select your agent, go to the Tools tab, and click + Add a tool.
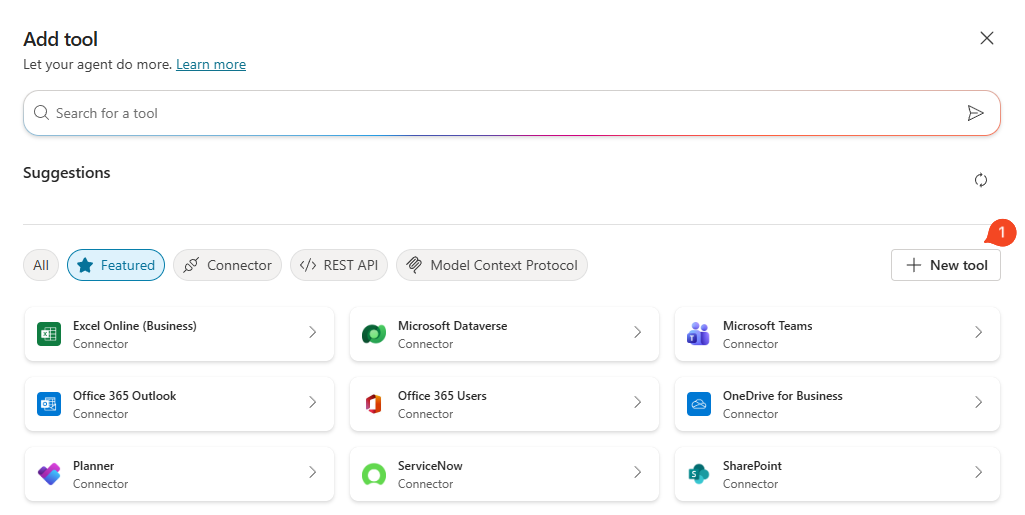
Step 2: Create a New Tool
In the Add tool window, click the + New tool button on the right side.
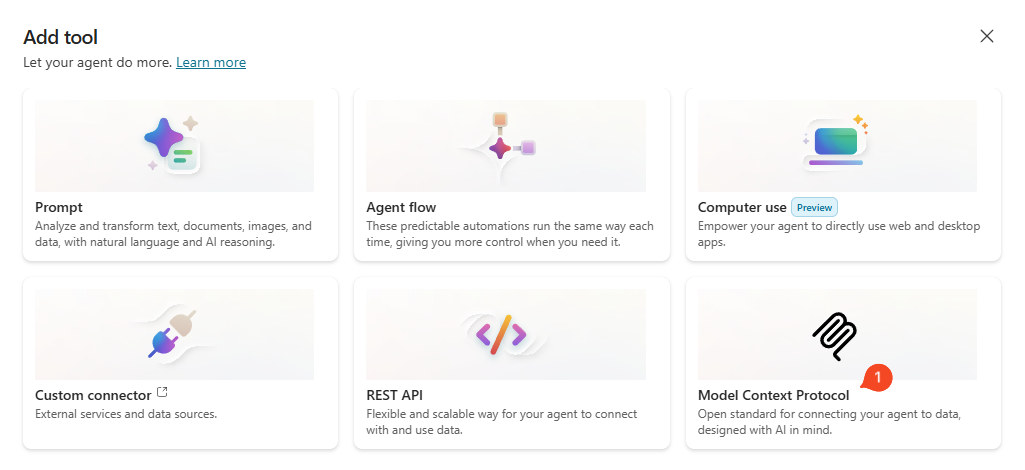
Step 3: Select Model Context Protocol
From the available options, select Model Context Protocol.
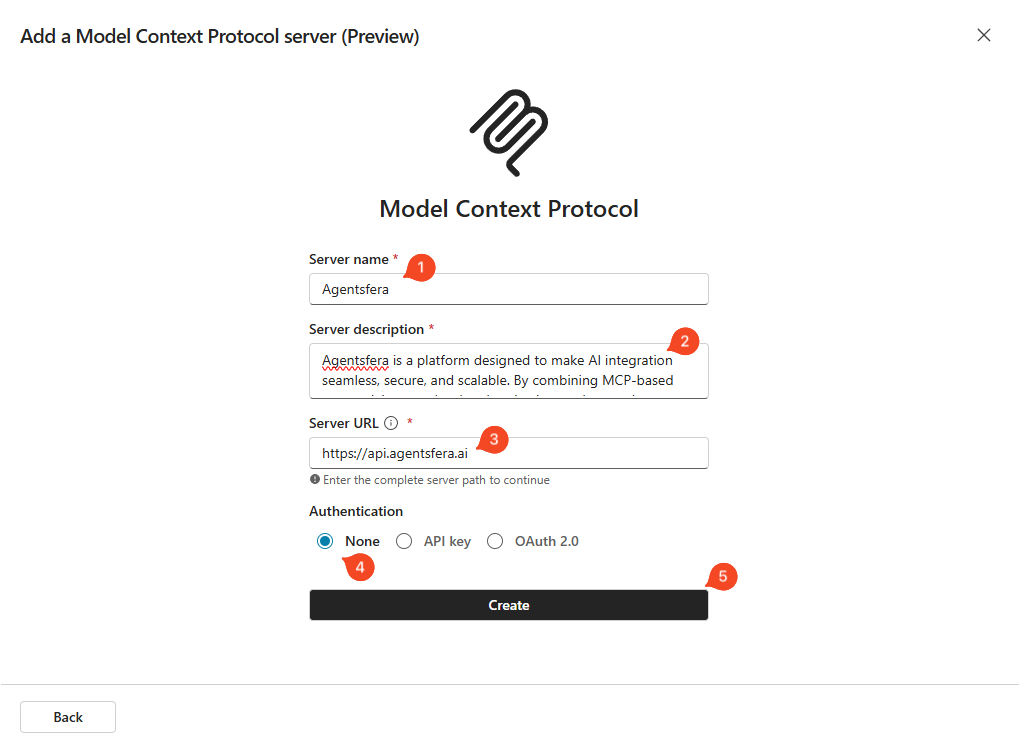
Step 4: Configure MCP Server
Fill in the server configuration:
Enter a name for your server (e.g., "Agentsfera")
Enter a description with at least 30 characters
https://api.agentsfera.aiSelect None
Then click the Create button.
Step 5: Create Connection
A window for adding the connector will open. Expand the Connection dropdown and click Create new connection.
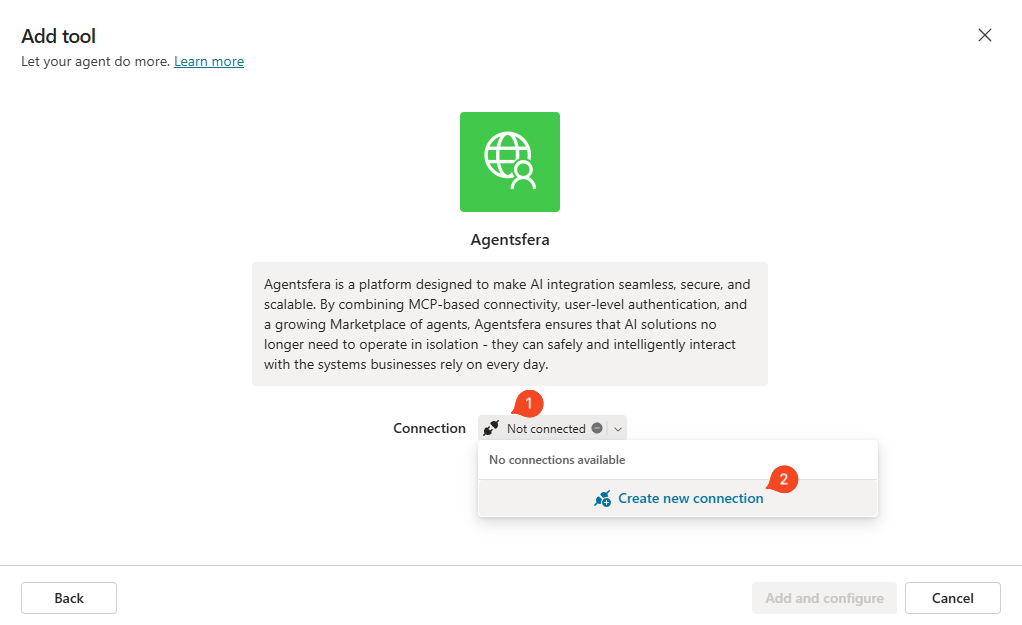
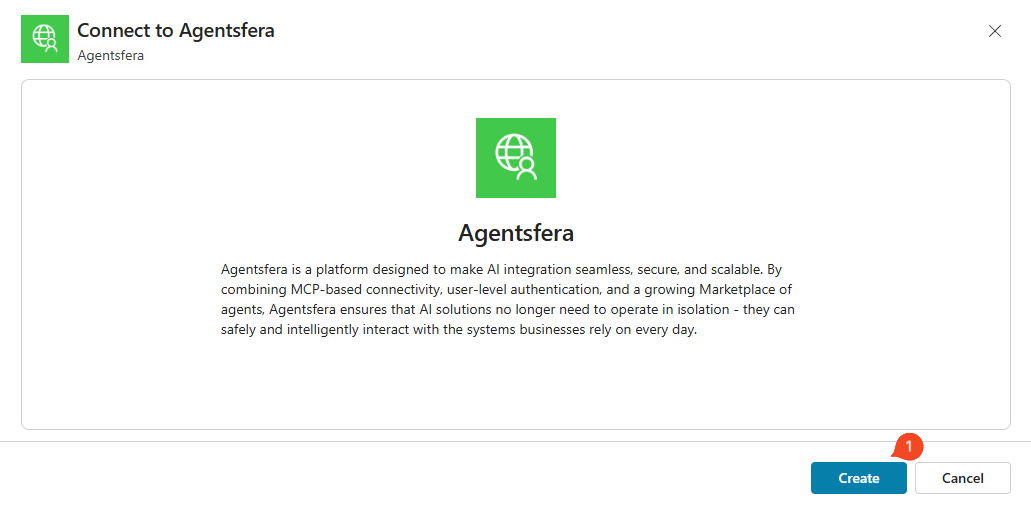
In the Connect window that appears, click the Create button.
This will return you to the connector window. Now click Add and configure.
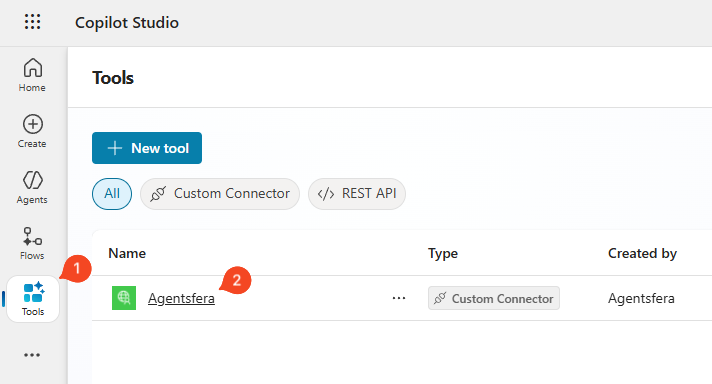
Step 6: Navigate to Connector Settings
Your connector is now successfully added. Next, you need to configure two headers: Authorization for API key authentication and user-session-id for maintaining context across conversations.
In Copilot Studio, go to the Tools section and select your Agentsfera connector.
Step 7: Configure Authorization Header
You will be redirected to Power Automate connector settings. Go to the Definition tab, in the Policies section click + New policy and configure the Authorization header:
AuthorizationBearer sk-xxxx...). You can find your API key in the project settings.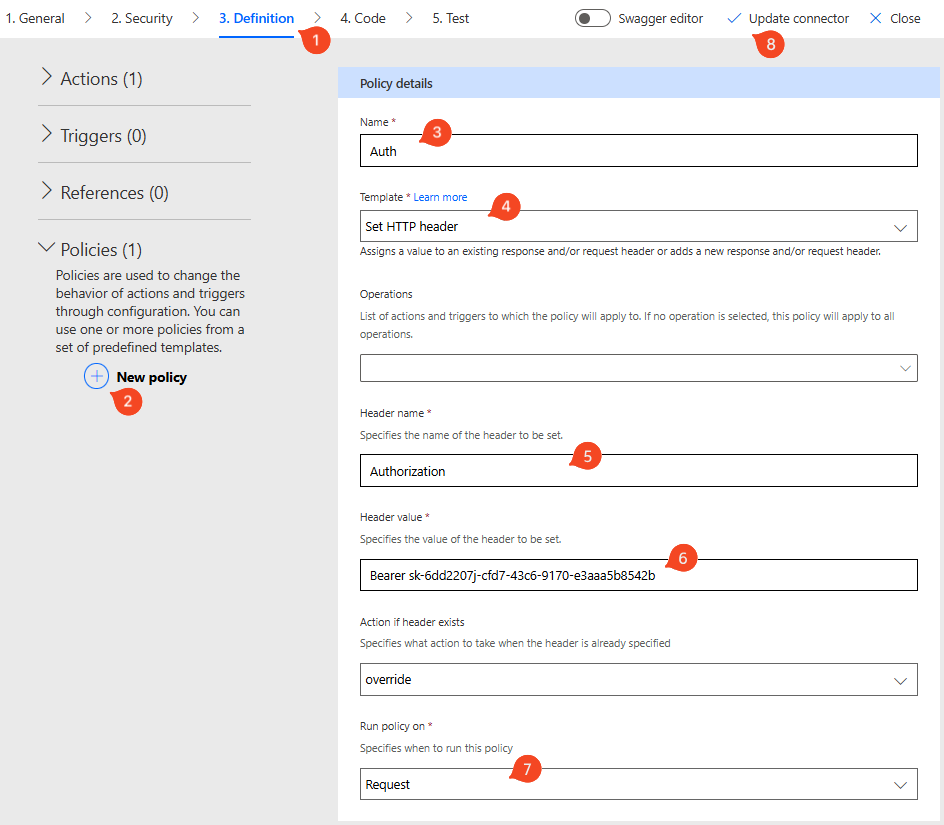
Step 8: Add User Session ID Parameter
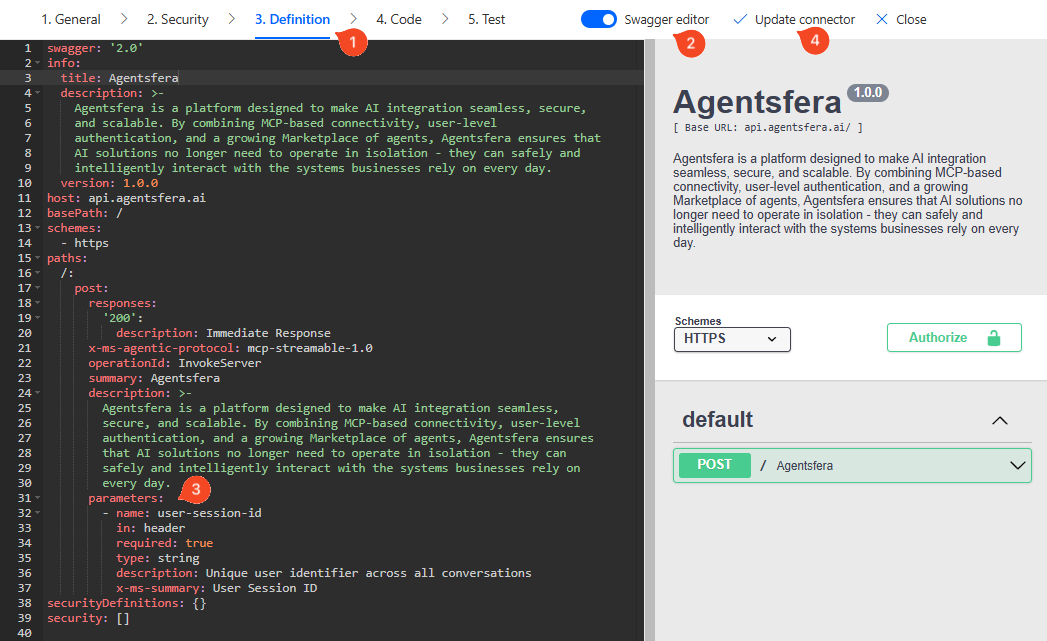
To maintain conversation context across sessions, you need to add the user-session-id parameter to the API definition. In the Definition tab, enable the Swagger editor toggle in the top right corner.
Locate the post: method in the YAML editor and add the following parameters block as its child element:
      parameters:
        - name: user-session-id
          in: header
          required: true
          type: string
          description: Unique user identifier across all conversations
x-ms-summary: User Session IDClick Update connector to save your changes.
Step 9: Set User Session ID Value
Return to your agent settings in Copilot Studio. Go to the Tools tab and select your Agentsfera connector.
In the Inputs section, you should now see a User Session ID field. Set its value to User.Id from the System tab. Then click Save.

Done! Agentsfera is now successfully connected to your Copilot Studio agent. The tools defined in your Agentsfera project should now appear in the Tools section.